If you are a user of your DAW’s included multiband compressor plug-in or you use a third-party plug-in like Waves C4 or FabFilter Pro-MB, you’ll definitely need to familiarize yourself with its interface in order to quickly tweak parameters.
Similar to a broadband compressor, you’ll spend most of your time adjusting attack and release times, threshold levels, ratio amounts, and makeup gain values and you should aim to adjust these fast without needing to search them for minutes.
Start from a Completely Initialized State
Just like with a broadband compressor, it’s best to set up a multiband compressor from a neutral state (with no compression being applied). Raise all thresholds to 0dB (or higher, if needed) so that no compression is occurring, and turn off makeup gain until you need it. By starting with a clean slate (no processing), you’ll be better positioned to make choices that help your mix instead of hurt it.
Solo Bands to Analyze Specific Frequency Ranges
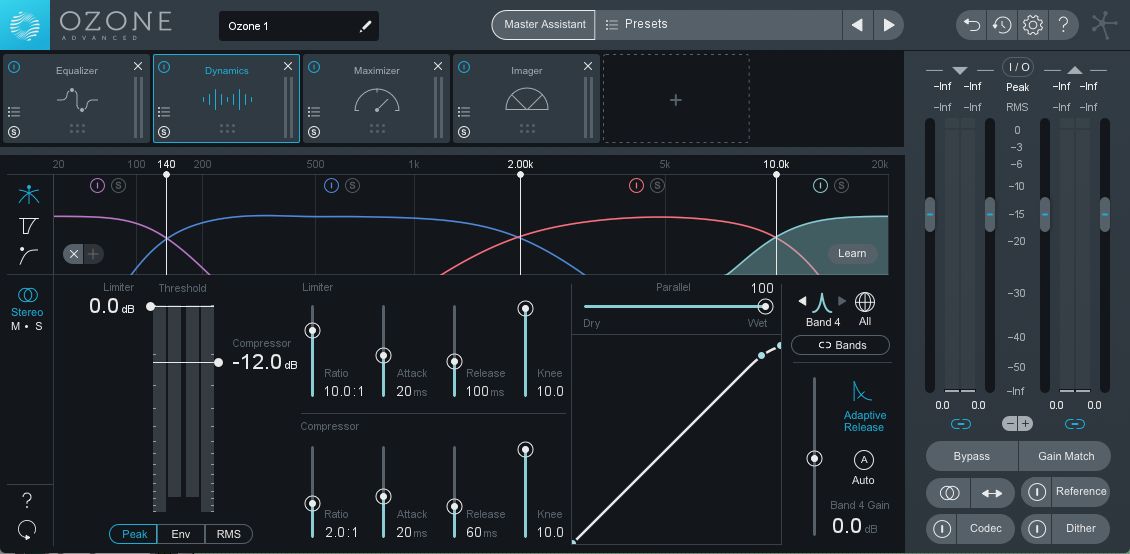
The whole point of a multiband compressor is that it allows you to compress specific frequency ranges of an audio track, as opposed to the entire audible spectrum.
By placing a multiband compressor plug-in set up in this manner on your master bus, you’ll be able to quickly analyze the lows, mids, and highs of your audio simply by soloing each band without any compression actually occurring.
Using a multiband compressor in this manner can actually be more useful than using a spectrum analyzer, allowing for sonic analysis instead of a visual representation.
Don’t Use All the Bands at Once
One of the reasons you may be discouraged from using multiband compression is that things can quickly get out of hand when you’re dealing with multiple bands, each being compressed differently. The best way to avoid this is by only using a single band at a time.
Instead of thinking of it as a multiband compressor, think of it as a band-specific (or bandpass) compressor. Bypass all of the individual bands except for the frequency range you want to focus on.
Use Multiband Compression Like a Dynamic EQ
Let’s say you’d like to add some weight to an acoustic guitar track without making it sound boomy. Set up a single band of your multiband compressor plug-in to work in the guitar’s lowest octave, 80Hz–160Hz, then start with a mild ratio around 2:1. Lower the threshold until you’re achieving a few dB of gain reduction, then adjust the makeup gain to compensate.
The mild compression will help accentuate the low fundamentals of your guitar tone, giving it a stronger low-mid character without sounding boomy or uncontrolled. And, because it’s responding to the dynamics of your audio, you’ll avoid the inconsistent results a static EQ boost could create.
Just like with a broadband compressor, a soft touch can make things sound big and full, while heavier compression can suck the life out of your audio.
Fix Sibilance and Other Troublesome Sonic Artifacts
If you’ve ever used a de-esser plug-in, then you’ll have experience with this concept of band-specific compression. A de-esser is a compressor tuned to the frequency band responsible for harsh sibilance.
In the case of de-essing, set up your compression to cover the range between 2kHz and 10kHz, roughly. Solo that band then adjust the frequency range to really zero in on just the most troublesome frequencies.
Once you’re focused on sibilance and little else, adjust the threshold and ratio controls to achieve whatever level of gain reduction your situation requires — 5dB–10dB of gain reduction would be a suitable starting point.
You can apply this same principle to other common mix issues, like loud finger squeaks in an acoustic guitar track.