Genelec Simple tips for improving your mixes – Score Music tech
Every sound you hear when writing, recording and mixing is influenced by the quality of your studio monitors. They are arguably your single most important equipment investment, so choose wisely.
But even if you own good quality monitors with a flat, neutral frequency response, the interaction between your monitors and your room’s acoustics will significantly affect what you hear, and this can often produce a mix that may sound great in your own studio – but sounds disappointing when played back on other systems.
While we’d always advise investing in some basic acoustic treatment for your room, here are some other simple tips that will help avoid the disappointment of your mixes not translating well to the outside world.
For more detailed information, you can view and download Genelec’s simple Monitor Setup Guide here
Monitor Choice
Rather than focussing on a monitor’s driver sizes and power ratings, the most important criteria for choosing the correct monitors are your typical listening distance, the overall frequency response required, and the playback level that you need to monitor at.
If your listening position is too close or too far away from your monitors then this will affect the audio quality noticeably. So decide on your listening distance, what SPL you need to monitor at, and then choose a model that delivers the level you need, and the LF extension you require.

Monitor Placement
How your room is set up and where you position your monitors will affect their performance significantly. Taking a simple stereo setup as an example, here are some goals to aim for:
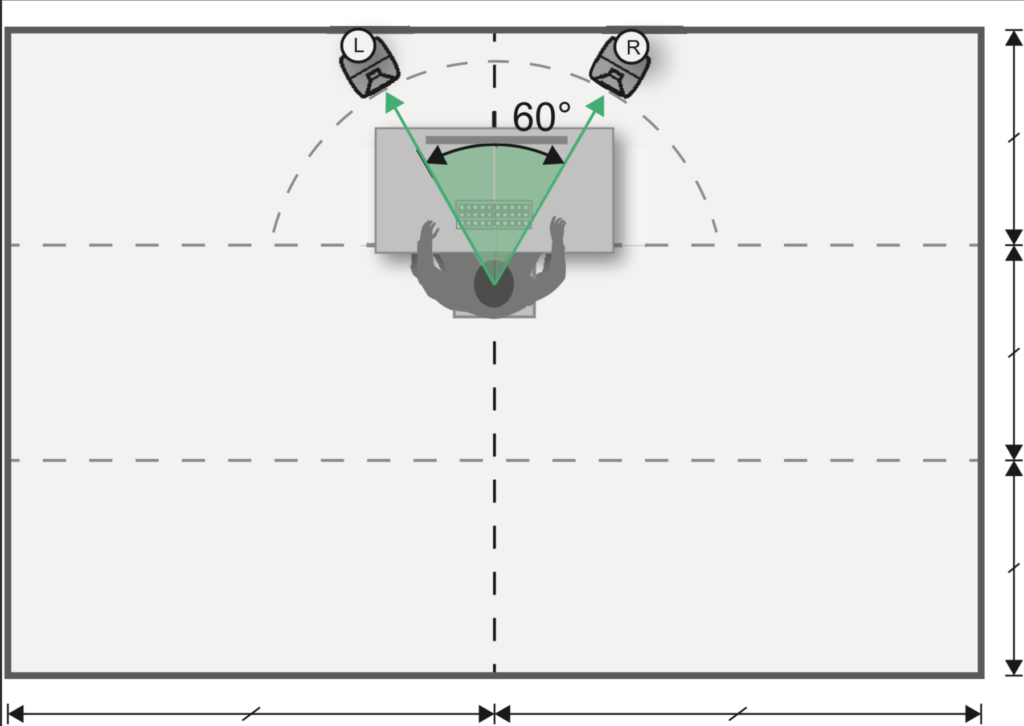
- To improve imaging, ensure that your listening set-up is symmetrical and centred in the left-right axis of your room, as in Figure 1.
- Position your monitors at ear level so that the monitors and the listening position are at the corners of an equilateral triangle, and aim them at your listening position without any obstructions such as computer screens.
- Try to position your monitors between 5 cms and 60 cms from the rear wall, to avoid a dip in the LF region. Some further EQ adjustment may then be necessary (see next section on Calibration).
- A subwoofer can really help to achieve a neutral, controlled LF response, and it also allows the main monitors to focus their energies on the rest of the frequency spectrum. Place it along the front wall, slightly off-centre from the room’s middle axis.
Monitor Calibration
Once your monitors are correctly positioned, it’s important to find out how the room is affecting their frequency response, in order to minimise any negative acoustic effects and achieve a more flat, neutral in-room response.
The most accurate way of doing this is via a reference microphone and simple measurement software, so that the response of each loudspeaker can be measured at the listening position. This response can then be analysed, and corrected via adjusting the monitor placement and/or using the monitor’s own onboard EQ filters.
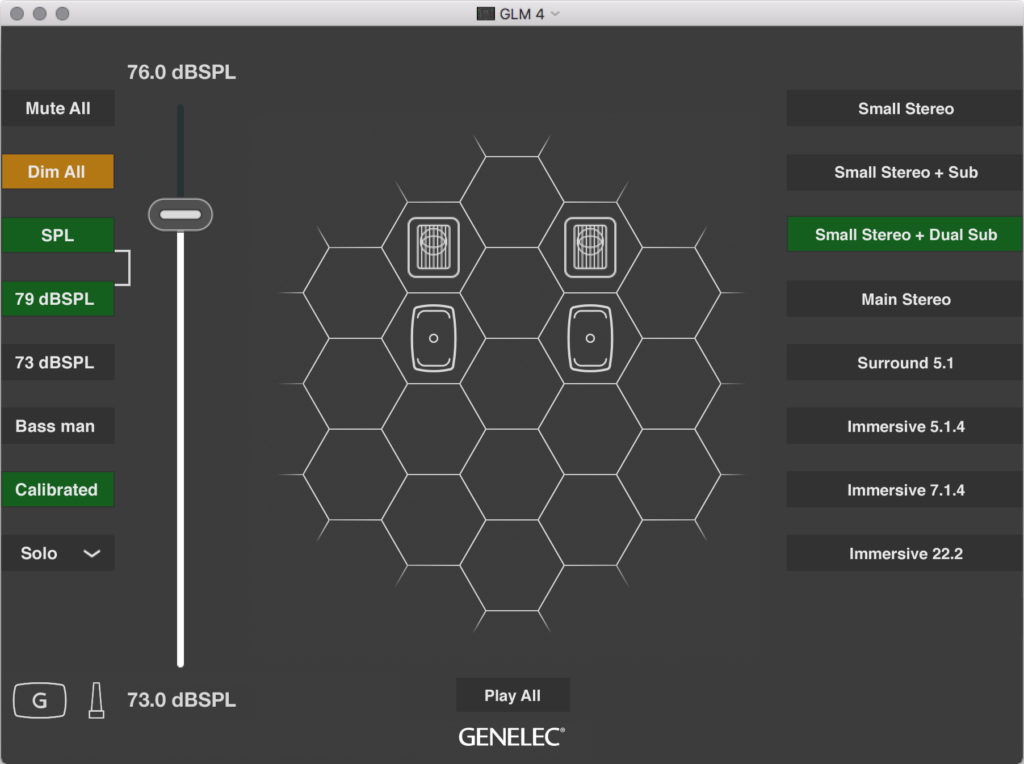
Monitors will benefit further from an even more comprehensive type of room correction – via calibration software – which allows very detailed calibration of the monitoring system to the room, with the ability to further fine tune the performance to your own individual preference. See Figure 2.
Conclusion
There’s no doubt that with careful attention to monitor selection, placement and calibration, you’ll achieve a far more truthful, reliable monitoring system – and produce mixes that translate consistently!